So I nearly finished up my first animation and decided that it was time to render it. I had rendered bits and pieces as I went and did not really notice anything since they were single frames. When you switch from frame to complete animation, you gain an appreciation for just how fast the brain works. In order to fool the brain, the computer needs to display 24 frames each seconds.My animation is just under 10 seconds, so its length is just over 200 frames. My first couple of tries went quick since I toned down the render requirements, but I would continually get errors with the particle system render, which made them fairly useless as something to display. However, knowing the settings were high during the creation and animation layout stages and those images came out nice looking, I was left with only one choice. Unfortunately, each frame on those setting takes between 12 and 15 minutes to render - as opposed ot the first time which was under one minute and the second which was three to four.
So, I have been rendering this animation since Saturday and it will take a decent bit of Monday to finish it. Because of this long length of time, I have been afraid to work on the other project, which has a tendency to cause the modeling program to crash. While I could restart the render from the last finished frame, as I am rendering each frame as an image, I would hate to loose anything I changed after saving last. I have been fooling around with other items, but I am not sure if I will post any of those, especially since nothing is anywhere near any stage of completion. Until next time,
~gunnah
31 December 2012
29 December 2012
Slowly Progressing through the Holidays
So I have been making progress, but it has been extremely slow. So slow that I really do not have any images to post. As I have said, currently I am trying to knock off two projects before the new year, or shortly into it, then return the the modeling for the game. The one project which I am not really disclosing much on until its release is moving along at a decent pace, but nothing Earth shattering. Since I am trying to keep it a surprise, I am going to leave it at that, it probably needs about four or five hours, before I am happy with it, then it will need to render and hopefully it will be done.
The other big project is the abandoned building I started back in October and which has not had much new on it since mid-November. I have fixed some of the aspects I did not like so far. I have a little to add still in terms of what has already been modeled. After that, I need to get the flood lights up and textured to finish off that part of the project. At that point I will do a final, before post-processing render. Then I will move on to post-processing, which will take a little time I am sure, but I hope when compared with the before image, the difference is noticeable. Estimating what that is going to entail, and assuming a minimum number of crashes and data loss, that is probably about ten hours - mostly because I need to learn about post-processing while I am doing it on this project.
Not really sure how much I am going to get done since I am trying to enjoy some of the gifts I have received over the holidays, but I really do want to finish these projects and get back to the game. Once back on my project, I will probably start blocking out a level or two, just to get a feel for how large I want the map to be and how much I need to make. From there I will make a list and start doing one piece at a time, slowly building the level in something playable. Once the level is done, I will worry about the tanks, weapons, turrets, satellites, and other non-static objects. Well, hopefully I have something next time, until then,
~gunnah
23 December 2012
The Holiday Season
So it is that time of year when everything is down to the wire and nothing gets done, so why should I have expected any of these projects to be any different? I did work on modeling, but it was mostly just fooling around learning little things. I worked on making an arch and then modeled a leg, but nothing really with which to do anything constructive. Hopefully, with my altered shift for the week, I can get to something a little more productive. I would really like to get those two projects I have been working on finished for the end of the year so I can start the year off fresh.
I think I will keep my ramblings short this time. So until next time,
~gunnah
I think I will keep my ramblings short this time. So until next time,
~gunnah
17 December 2012
Temptation of the Holidays
So I did not get anywhere near as much done as I was hoping. I am going to blame the lack of progress and missing Fridays post on working overtime, being semi-true. I have found myself fairly run down and just needed a rest from everything, so over the last week, what little time I was not at work, I was asleep. Hopefully the coming weeks will be more forgiving and I can begin making progress again. I really need to finish this couple of side-tracks and get back to the main reason for all of this.
With that little bit out of the way, I can move on to the title. Over the previous week I found two holiday themed contests, though I have a problem with both. The one ending first, I simply do not have enough time to complete. I have a great idea, but working full time and missing the first half of the competition, I feel I could never finish the project in time - just look at the numerous work in progress pages never finished.. The second competition I feel I could have done, but I lack the great idea. Originally, I was going to but everything else off until I finished these, meaning I would not get back to where I was until the second post of the new year. However, I think I am going to skip these for the time being and see if anything is run during the spring.
Hopefully, I will have something to show for next post. At the moment I do not have an extra work slated for the next week, but that can change real quick. Until next time,
~gunnah
10 December 2012
And the Torque Tutorials are Wrapped Up
I have finished the Torque tutorials, which is a nice plus. I do not feel I learned everything I need, but I do think I got a good start on the basic layout of the development kit. Of course, there is nothing to show. As I mentioned before, I was trying to get through the tutorials as fast as possible and this precluded making models and things of that nature. Hopefully in the near future, I can get something like a mock up level made. But I would not hold my breath since that may take a while. On the plus side most of the tutorials worked. For some reason the weapon models did not load properly, but that was not a big concern of mine. They behaved as they were intended to, and the models came with the engine. My only other problem was I could not package the tutorial. Apparently their old code was written poorly and they have not made the time to correct it, so the button does nothing. When I went to do it manually, it said my PhysX engine was either not installed or I needed to set a environmental variable. I did not feel like doing either, so I have not worked through packaging a game yet. To be honest, I am hoping the graphics version is up and running by the time I am ready to package a game since it looks much easier than the command line version available to me now. That about wraps up Torque for the moment. I seem happy with it, though who knows where I will be blown by the time I am ready to release. Unreal has a new version coming out, I may want to look at that - at least the UDK version of it.
I also want to apologize for missing the Friday post. Long week and I just forgot. Actuially I fell asleep which is almost the same as forgetting. But it was not like I had that much to say. Next week looks to be filled with overtime, so my post for next Friday may be skipped if I have nothing new to say. Until next time,
~gunnah
03 December 2012
Should Learn to Hold My Tongue
So after a promising Monday, I ended up working overtime most of last week. That is why there was no post Friday, there was nothing new to post. I am hoping this week will work out a little differently, but who knows what is in the cards.
As for what I actually did, it was not much. I started the new weapon tutorial for Torque, but got almost nowhere with it because of the overtime situation. I still need to wrap up the image I have been working on for a month and a half, which feels so close but so far. That being said, I did start watching a few new tutorials. I plan on working both tutorials into a small ten second animation which is going to start the game. I have most of the animation laid out, but I will go over details when the animation is further underway.
That is it for now, hope everyone has a good week and I can get something done. Until then,
~gunnah
26 November 2012
Continuing with Torque 3D
I have managed to get through a bit more of the tutorial for the Torque 3D engine, though not really much to show as it is mostly their objects with which I am working. So far I have done object placement, triggers and characters. The next section is weapons, which for my project may not be the most useful of tutorials, but hopefully I can learn a bit from it to make a few customizations to tanks based on what modules they choose. I do not want to get beyond myself depending on what the next week brings, but I feel confident I should be able to get through at least that tutorial.
I have also watched a few tutorials and re watched a few with special attention to the compositing aspects. With any luck I will get back to that scene in the coming week and try to finish it off. Again, I do not want to get too far ahead of myself, so I am going to leave this topic here.
With any luck overtime will be a little more sparse so I can play a little more with my side projects. Starting probably next week, I am going to be reviewing for my next exam. This will likely eat a bit of time from what I can do on these projects until I take that exam in early January. Until next time,
~gunnah
24 November 2012
More work with Torque 3D
Most of the time I had to work on this project went into learning the new engine. It was a real short week to start with so I still have quite a bit left of the tutorial to finish in their series. So far I have covered basic syntax, which is fairly standard object oriented notation, and how that syntax can be hooked into the world editor. So far it does not seem very difficult, however, I have only created the most basic of triggers so far. While there are still several questions about various aspects of the engine which I am thinking will be answered as I go through the tutorials, I seem happy with this engine. Of course a week ago I was happy with UDK, so the final decision may still be in the future.
There was mot much to show so far since most of the tutorials use either features built into Torque or are just writing to the command line. My guess is that I may not really be showing any progress off until I finish all of the tutorials ad start a game on my own. I may be wrong and by the end may start adding my own elements into the tutorials to keep them interesting, but even then 95% of what you would be seeing was someone else's work. Hopefully more to come in the next post about my progress and hopefully something a little more tangible. Until next time,
~gunnah
18 November 2012
Rough Week
During the previous week I got nothing done just like I was guessing I would. My day was pretty much get home, go to sleep, get ready for work, leave, and then work all day. Saturday I had a test in the morning, so any free time I had during the previous week was cramming just that little extra bit.
Now onto what I actually did relating to the project: Not much. I know my scene is almost finished and I probably should have just worked on that, but I kind of wanted a bit of a break. Also, I am now up in the air about what kind of floodlight I am adding to the scene as I got a different idea for what I think it should look like. Once the lights are in the actual modeling and texturing end should be finished, save for any details which I do not like after looking at the scene as a whole - like the post texturing. Then it is just a matter of post-processing to give it the right feel and I should finally have something done, albeit not actually part of the project proper.
Now, enough about what I did not do. I have begun looking again at engines. Do not get me wrong, so far UDK is looking the most likely, but I want to get a feel for some other environments before settling on any one engine. I was actually hoping to have a review of the engine ready for this post, but it is taking me a while to get it set up. Right now I am looking at the Torque 3D engine, which is nice because it is an open source engine. It looks similar to UDK, but does not have the fee UDK does which is a plus for someone who is completely broke.
Working a bit of overtime this week and then there is the holiday at the end of the week, so I may or may not post on Friday. Until next time,
~gunnah
12 November 2012
Abandoned Building Scene (Part V)

In other news, I have a lot of overtime this week, so I may or may not post on Friday depending on what life conspires. So, until next time
~gunnah
10 November 2012
Abandoned Building Scene (Part IV)

Well, that is all for now. Hopefully this will be coming to a close soon because I really like how it is coming out and can only imagine what a bit after-render effects will do. Until next time,
~gunnah
05 November 2012
Abandoned Building Scene (Part III)

Now for what is new besides the re-texturing of the building. Stairs are slightly reformed, giving a slightly more interesting look than before, and are textured which made the last render look bad. The sky has been added to this shot, and I think it sets the scene off better, just comparing the brightness of the flooring. I have scattered a few little extras around in the shape of metal drums, though I have not gotten to making the palettes yet. I made some barbed wire for the wall, but I think an post or something on the corners is needed to anchor it a little better, it may also need a few posts to give it just a little more realism. I have started working on the lights - a combination of floodlights and siren - though they are not in a shape which I feel is presentable. Then the only modeling left is the debris, which I am really giving a decent bit of thought trying to think of plausible bits to be scattered around to really make the scene. Then the only objects left to model are either casting shadows in the foreground behind the camera or in the distance breaking up the horizon.
While that probably seems like a lot, the overall number of objects is fairly small and now more for detail - except the lights which will add lighting also - which means the modeling and texturing portion of this is actually at a foreseeable end, though not here quite yet. Again, once the modeling and texturing is done, the final lighting is set up to get all of the shadows and detail out of the scene and then it is on to the rendering. The final render will have a bit of post-processing involved since I want the distant wall to be almost behind a little mist. Besides that, I will probably only do a small bit of light enhancing. I have not done anything with the end of 3D modeling - I have been more focused on the modeling.texturing since those are the important ends to game design - and my projects usually never get that far anyway.
Well that is probably enough to poor anyone, so I will leave whatever else somes into my head for next time,
~gunnah.
03 November 2012
Abandoned Building Scene (Part II)

Besides the obvious texturing changes from last time, there were a few scene changes. I was talking about changing the width of the yard, I think I am going to leave it since I accomplished something similar by changing the cameras height and rotation. The doors are also a new addition. Finally, I added a temporary light so that the detail being added to the scene was noticeable This will be removed once I add the other lights around the scene - perhaps earlier to just get a feel where the others lights will be needed.
For those interested, I think I mentioned I was bracing for the hurricane in the previous post. Since I am making this post, it is obvious nothing serious happened. Lost power for a dat and a half, internet for three days and television for four. Everything now seems to be in working order and hopefully with the little downtime I have I can rush through some of those to-dos I still have with this scene. Until next time,
~gunnah
29 October 2012
Another Disappearing Act
So the last week managed to disappear before I knew I was in it practically. Long days at work coupled with a few stresses at home left very little time for anything. And the worse part is I am not done yet. I need to study for a test in a little under a week, which I do not think I need a ton of review, but do want to anyway. Also, there is a hurricane pointed in my direction which may strike havoc into any progress I may have made not going to work this week. Hopefully it blows through, but I do not think this one will be that nice.
I did make a little progress, but I do not feel it is enough to show off, so I am holding it until I get more done. Until next time,
~gunnah
I did make a little progress, but I do not feel it is enough to show off, so I am holding it until I get more done. Until next time,
~gunnah
22 October 2012
A lot of Overtime; Work in Progress: Abandoned Building Scene (Part I)
I missed my post Friday because of a large amount of overtime I have been working. On top of my normal hour commute each way and eight hours, I picked up overtime each day last week. This means tat I was too tired to do much of anything last weekend. In fact, I did not touch my computer for three days last week. So I did not rush to put up a post when I awoke Saturday because I really had nothing over the previous week.
 Over the weekend, I started work on an interesting scene I stumbled across in my internet browsing. It still has a lot to be desired, but I think it is coming along nicely. It needs a decent amount of modeling to be done on the building to the left side. I would like to made some objects to scatter around the floor, as well as some detail items which are not yet in - mostly barrels and palettes, I think, though I want an ivy growing over the back wall and barbed wire going around the top of the fence. The lighting still has a bit to be desired, though I can work on that a bit more once everything is in place. My only other complaint is I do not really like the camera angle, though I have been finding a hard time getting a better one.
Not sure how the next week is going to work, I may be getting more overtime and I have a lot going on personally. Hopefully I can find time to do this though,
~gunnah

Not sure how the next week is going to work, I may be getting more overtime and I have a lot going on personally. Hopefully I can find time to do this though,
~gunnah
15 October 2012
Work in Progress: Motor Pool Garage (Part II)

~gunnah
13 October 2012
Just another cog in the machine

Not much else done, but hopefully that changes in the near future. Until next time,
~gunnah
08 October 2012
Work in Progress: Motor Pool Garage (Part I)

And I went and got ahead of myself again. Hopefully, I will have the modeling end finished off by the end of the week and figure out why it did not render nicely. So, until then,
~gunnah
06 October 2012
Rusted I-Beam
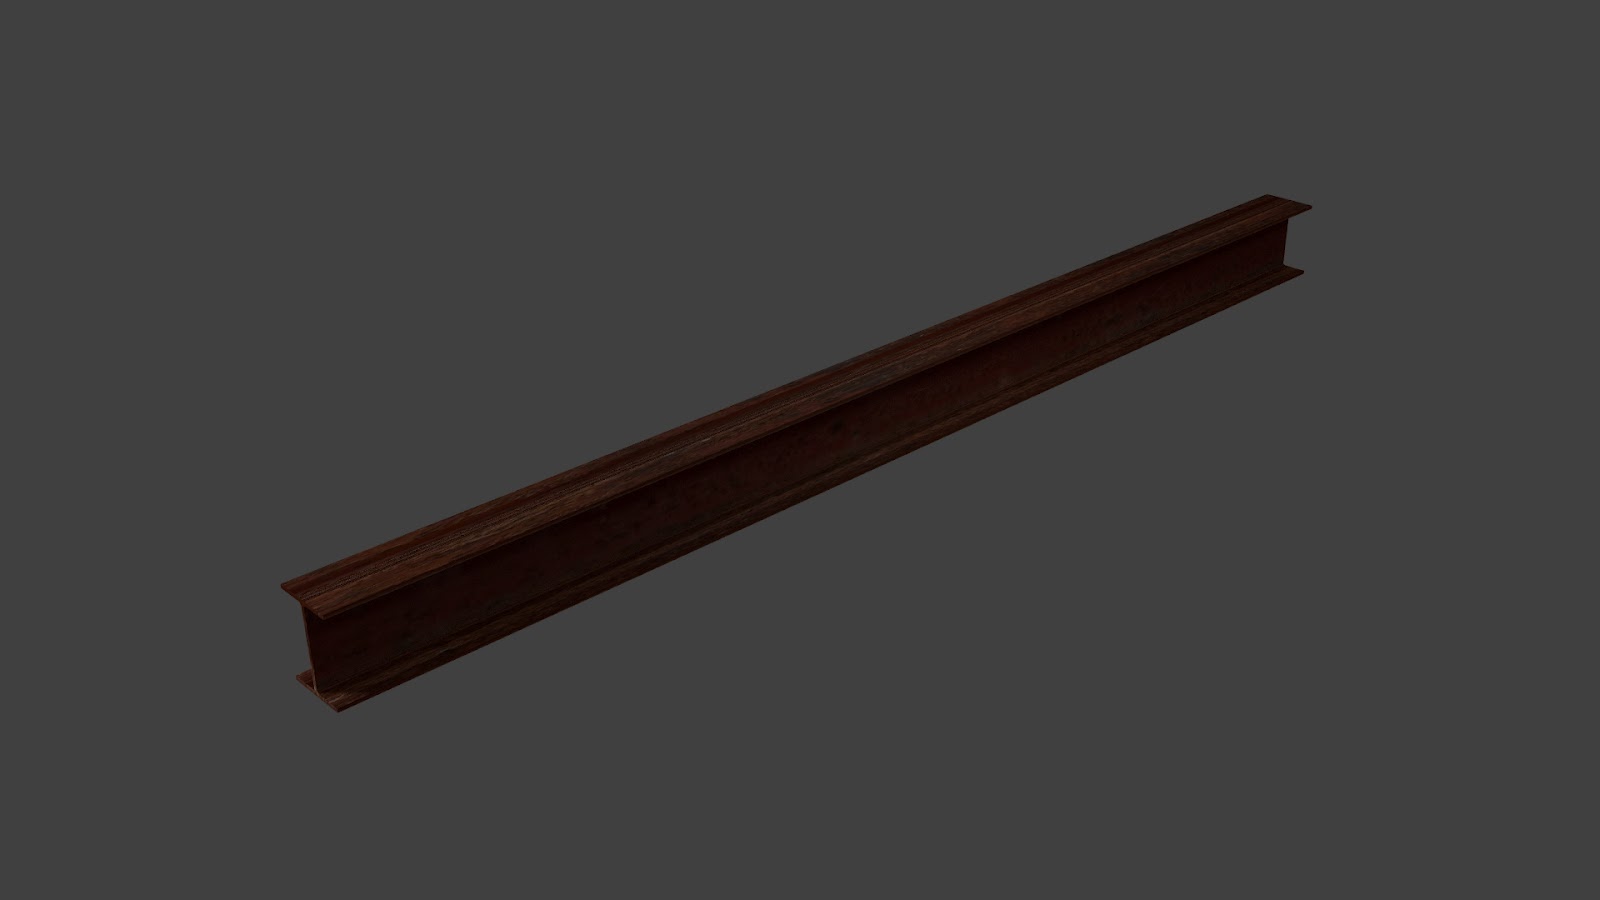
Now for me to pick apart the i-beam. The model itself I feel came out very nice and at 78 faces should not break anyone's computer. While I could construct an even lower polygon count i-beam - this one has some smoothing where the vertical piece meets each of the horizontal pieces - that is not a big worry at the moment, though might become one if my scenes get too detailed. What real bugs me is the texturing. Overall it is not awful, though would probably work nicer if the bump map was working as rust does not come off as flat as the model looks. But what is broken is the UV layout, which I realize means that even the nicest texture will not come out that great. For some reason the program insists on making each of the non-end-cap faces the same size on the UV map which causes the texture to stretch in tight spots, though it lays about how I want it to in the larger areas. Once I get the UV map to lay right, I can fit the texture again and see if that also needs work. Until next time,
~gunnah
01 October 2012
Monday Again
Another incredibly short weekend. Saturday was mostly spent on getting my computer working right. I have a hard drive that something is wrong with, I am thinking it is the casing, and it is sometimes connected and sometimes disconnected. When I access it when connected, when it disconnects Windows freaks and I cannot even shut down. So I spent Saturday figuring out to restore full control to the computer for some reason I need to restart into Safe Mode and then restart again.
Now, ever since I put a router in my room, I have been the Network Administrator for my house. I was doing things here and there before that, but since it is easier to connect to the router in my room, almost everything uses it. Since everything uses it, it is now my responsibility when anything goes wrong to fix it - not sure this is completely fair, but life is not, so no use complaining. For some reason the printer hooked up to the wireless router was not behaving and that is where most of my Sunday went. Worst part was, by the end of the day it was still only working with a USB cable.
Besides all those distractions, I have been working on a genealogy project making charts. Well, when my computer freaked Saturday, it corrupted four of my files and I do not back anything up - not really by choice, just no space - so Sunday was spent remaking most of those. Hopefully this project will die down soon enough and I can go back to playing with 3d modeling and finding an engine to use for this game. Well, until next time,
~gunnah
29 September 2012
Fooling Around
I know that us not the most productive thing to do, but it does help to learn the software. I had a few ideas I was going to ty to get done for this post, but none of them occurred. The first was a sci-fi robot, which might still happen to get some experience making sci-fi models. The next was a garage scene. I do not have it entirely mapped out in my head, unlike most projects, but it seemed like it might be a cool backdrop for future works.The former is barely started as I could not find a decent image of the robot I was looking for, but the latter is in a bit better shape. I have the floors and walls looking how I want them and I am now working on the first piece to sell that is is really a garage and not just a back alley. In addition to making some of my future images look more interesting, I am also playing with the texturing. I am using free, pre-made textures instead of trying to reinvent the wheel like I was the last time I was trying to texture items. These already made textures also help since they are of a very high quality.
Hopefully I can get something to picture by the next post. Until then,
~gunnah
Hopefully I can get something to picture by the next post. Until then,
~gunnah
24 September 2012
A very long week at work
I hate to use work as an excuse for anything but the company I work for is running us shorthanded which really took a toll on me. I got almost nothing done last week since I was too tired to do anything after work and slept so well, that I had almost no time in the morning to do anything. This tiredness continued into the weekend where I slept a good deal of Saturday. While I did not actually get to make any progress on any of mu projects, I did watch quite a few tutorials over the weekend. Unfortunately, these tutorials were all that I had the strength and time to do. Also, I may be coming down with a cold which would mean even less productivity, unless I took a day which I would probably use to only work on my modeling - though this is highly unlikely. Well, until next time,
~gunnah
~gunnah
16 September 2012
A very long week and a very short weekend
Sorry for not posting anything on Friday, I just was too tired and really had nothing to say. Though it is not like I have that much more to say at the moment. Trying to get back into the swing of things at work and it is very tiring at the moment. Hopefully I will get into a routine or switch occupations (which is what I would really like) leaving me a little more time to fool around with modeling.
Now, I did do some things towards learning to model better. Primarily, I watched how a handful of cubes and cylinders with few extrusions can becoming something very sci-fi like. I am probably going to try a sci-fi spaceship scene before returning back to work on the project - in addition to the well and subway scene. Everything else will be on the back burner until those three scenes are done. Then hopefully I can start getting a few tank prototypes started and the project will really be moving.
After watching the sci-fi scene tutorial, I have come to the realization I need to watch more sci-fi in space shows. While what I am doing does not really need to be in space, much of the artistic details can be seen in outer space science fiction with exposed wires, fused and vents. So I am hoping to get a little time to watch some programs along those lines before starting to work on the tanks - just in case anone was wondering why I was pushing them off so far. Until next time,
~gunnah
09 September 2012
A little distracted
At the moment, I have quite a few things going on so progress will be a little slow for a little while. Hopefully in a week or two my life will settle into a regular flow. Then I will know when I can work on my project, as well as the other scenes I was doing. Between changing shifts, a new phone and my new video game that I am examining to see how a professional makes a 3D model, my life will be fairly full without everything else. At the moment that is my excuse and I am going to stick to it until life settles into a rhythm. I did begin work on a hangar for the game, though it is still only in the blocking out stage so it is not much to look at. Hope everyone has a good week,
~gunnah
~gunnah
08 September 2012
Work in Progress: Subway Scene (Part I)

~gunnah
03 September 2012
Nothing to Show
I know I could have went back and started working on one of the previously posted projects, but I really wanted to test out the glass material. Unfortunately, in the scene I was trying to render, a red, lit candle inside a dark blue glass holder, the holder would not render and I cannot figure out why. That was what I spent most of Friday and Saturday playing with, and while not extremely productive, it would have been neat. My main purpose for this was eventually adding the candles to the well scene, adding just that little extra bit of detail. Until I figure out why the holder did not render though, the only two candles will be inside the lanterns - something I have not gotten to yet.
The other thing I made was something a little more game inspired. I made a large open-metal tower. It is kind of hard to describe as I do not know the technical name, but it is a four-sided tower with thick metal poles at the vertical corners, horizontal braces at regular intervals and thinner braces connecting the two. I do not think I can use it in game since it has way too may faces - almost 4300 for just the tower, not even anything connected or on top - but it was fun to see how something could be made using just a small fraction then mirroring and repeating. Until next time,
~gunnah
01 September 2012
One very fast week
I do not know if work was exceedingly tiring or what, but the previous week does not seem like I even had free time to do anything. Today I managed to play a bit with the glass rendering in the new rendering engine, but that is really all I got around to doing. Hopefully I have more to show for the next post.
One thing I have been considering is what scale to work in, since for some reason it seems all 3D modeling programs are much smaller than game engines. Most likely it is going to be one of the following one-eighth, one-sixteenth, or one-thirty-second. Mu fear with one-thirty-second is that it is going to be too hard o detail anything one something that small. On the other hand, some larger buildings may pose a problem when trying to measure that in only one-eighth scale. My guess is that will be decided when I complete the first model or two Well, that is about all for now,
~gunnah
26 August 2012
Work in Progress: Well Scene Take 2 (Part II)

Most of the weekend was spent playing my newly released game. While that does not sound like progress, I have been using it to see what kind of detail is used in textures and what is used in models. I have also been taking a ton of screenshots so I can look at their work later. That about sums up my weekend, until next time,
~gunnah
25 August 2012
Work in Progress: Well Scene Take 2 (Part I)

Unfortunately the game I was beta testing a month or so ago is being released this weekend. That means I am unlikely to spend much time on anything besides that if I do not need to, though I may take a break once I feel I made it far enough into the game. I will again be looking to take an extreme number of screenshots so I can dissect how a professional game assets are created.
Well that about wraps up post number 100. I know I did a big thing for 50, but I do not feel I have done much with the game at the moment, but hopefully by 150 I will b back on track. Hope everyone has a good weekend,
~gunnah
19 August 2012
Doughnuts

Now, I did do a bit of work on the sword I was working on, but I felt it was not coming out the way I wanted it to. The big problem is in modeling the grip, which involves a series of twists in the model. I have a feeling that while the model itself goes together fairly easily, the calculated normals are unsure which direction to ppoint leading to black patches. Additionally, I was trying to figure out how to make use of the new rendering system I was trying to procedurally texture the model. I think I solved the texture problem, but the model itself requires a bit more work to get right. Note that the older render system is more like what I would use in a game engine while the newer render system is more focused on high quality rendering like in animation. Hope everyone has a good week,
~gunnah
18 August 2012
Scimitar: Day 1 (Metal Piece)
.png)
~gunnah
12 August 2012
I really need to find where my weekends go
So another weekend passed and I am left trying t figure out what I did during it. I suppose I should be use to very short weekends by now, but it never ceases to amaze me just how fast they fly by when the week seems to drag on forever. But I always have been bad at judging time and that is not what this post is about despite the title.
I have begun work on a little distraction, nothing big just something to have a bit of fun with, though I am leaving it at that until I have something to show in case that project goes nowhere. I have also began a game-relevant tutorial which I am hoping will make one or more of my meshes when all is said and done. Again, I will have more when the project is further along, but that should be within the next week.
And finally, I am looking at engines again. I found one that has a royalty-free license until distribution, so I will write more about that once I get it installed and running. Hope every had a good weekend,
~gunnah
10 August 2012
Learning more
While I am hoping to make a piece or two for the base level, I am not sure ho well that is going to work. Not for lack of will, but my weekends seem to pass real quick. Another aspect which may hold up making these little models is the need to do tutorials. While I do not mean tutorials are a requirement for everything, Completing a handful would make me more comfortable with the overall layout. Additionally, do a few tutorials may point out ways which I did not even think of to do these models.
Have a good weekend,
~gunnah
Have a good weekend,
~gunnah
05 August 2012
Hidden Progress
Just as the post name states, I have nothing to actually show for this post. Perhaps later in the week I will have more pretty pictures of tutorials I completed. Well, I suppose the place to start is where I left off last post: the high-detail, low-poly plane. One of the biggest problems I am having with the second part, I finished the first already, is I want to use a completely different set of software than the tutorial. Though I have tried the image editing software the tutorial uses, the price tag is very high, so I found a free alternative. However, not everything lines up perfectly, and I can say you do get what you pay for in this circumstance. That being said, I am going to continue with the free image editing software for the time being until I can actually afford the pricey alternative Another problem I found was the tutorial does not use UDK like I though but rather Unity, something I hope never to have to touch. So when I get to it, I will try to export it to UDK.
Now that looks like I did not do much, and that would be fairly truthful, at least for that tutorial. What I did do was get familiar with the new 3D modeling software, which is much like the debate I am having over which image editing software to use. Though in this debate the new, free software actually has a few advantages over the old software. One of the big ones is that the software will generate a UV map and while this does not sound like much, that is actually quite nice compared to making one in the old software. Note that while I have not actually unwrapped a UV on one of my models, I watched two tutorials on how to do so and practiced on a cube. One little annoyance I have is that scaled geometry keeps the UV points relative to their position before scaling. That may sound weird but here is what I mean: Say you have a cube and unwrap it, you would get the normal t shape. But let us say you did not unwrap it and instead scaled the Y and Z dimensions by one quarter and the X by three, leading to something that would be like a 6" by 6" by 6' piece of lumber (I was trying to make a pallet and that was to be the middle beams). I was expecting the unwrap to produce four rectangles and two square, but what ended up happening is the UV map for the cube was generated. With a bit of work, I manage to determine it was the scaling that did that, since moving the vertices to the same locations unwrapped in the proper form.
One of the bug advantages, since the new 3D modeling software is open source, the interface to export to other software is very open. So exporting to UDK only required a small python script. I watched several tutorials on how to move models from the 3D modeler to UDK so they would have the proper material, collision boxes and light maps. This just means that if I do decide on UDK, moving the models to it would be very easy, at least that is what it looked like. I will probably make my final decision about what software I am using at the same time, buying whatever licenses at that time. Currently I am looking into several engines, though I only have two installed at the moment, a few image editing software since I am not sure I completely like the free one I just started using, and a few 3D modeling programs, but mostly the two I have been suing, trying to decide if it is worth putting that much into the project or to just use the free alternative. Well, probably nothing definitive on those choices any time soon, so until the end of the week,
~gunnah
04 August 2012
Some Good and Some Bad
And t start off, lets go with bad. Last weekend powerful thunderstorms rolled through my area and caused a few power outages. One of these outages caused my computer to forget where it put its boot manager. After two days of looking online for how to fix it and trying all kinds of ideas from system restore to rewriting the boot manager through command line, nothing worked. As a last ditch effort to save some of what I was loosing, I used the command line and tried to move my well project amongst other files to the secondary partition of my main hard dive. Unfortunately, Windows relabeled all of my drive letters and command line never told me that it copied them nowhere, in fact it told me the process succeeded. So while I may have a copy floating in some ethereal space, I am considering that the only backups I have are from the previous reformat about a month or so ago. Luckily all I have really worked on was the hand in the well project. Unfortunately, I do not feel like doing that a third time at the moment.
In fact I have decided the focus on the new 3D modeling program, trying to learn that. I decided that have both 3D modeling programs on my computer, I was using the first one I learned as a crutch so I did not need to focus on the second program. With only one program, if I want to play, I need to learn the new program. This mean I will probably do a few tutorials then get back to asset design for the main project again.
Now the first tutorial I found happens to be a very good one for game design. The object manipulation is limited, as only extrude, scale and translate are really used; but for me this was enough to get the basic hot-keys down as well as a couple of tricks. Where this tutorial is handy is it teaches how to bake high poly looks into a low poly mesh. Additionally, the next section of the two sections of the tutorial is going over how to create a color and specular map. Now, the tutorial would have been very good if it stopped there, but it goes on to show how to import the mesh and maps into UDK and link everything to display properly.
So, sorry this was late, though I did not really have much choice as I needed to decide what to do before moving ahead,
~gunnah
28 July 2012
Learning Curve
So, like I posted earlier, I am trying to learn a second 3D modeling program. Not really because I am unhappy with what I am using or anything like that, I have found the results produce by the program to be superb so far. I want to make myself more versatile. The more programs I can use, the easier it would be to convince someone I know what I am doing. Unfortunately for me, when they build 3D modeling programs, they build from the ground up. Now this is great since it produces a wide array of programs but it means that each has a bit of a learning curve for the UI. With that said, I am probably going to go back to focusing on the well animation for the time being. Now, that being said, I am going to continue working on the new modeling software, just no like I did over the previous week. Unfortunately after a week, I have nothing to show, but I will do a tutorial or two in a few weeks to show off how well I have learned the new program.
~gunnah
~gunnah
22 July 2012
Work in Progress: Well Scene Animation (Part IV)
 |
| The hand before bending |
 |
| The hand with the lantern not scaled down |
 |
| Hand with scaled lantern |
 |
| The hands holding the lanterns in the well scene |
~gunnah
21 July 2012
Another hot week
So, I did a little of what I had lost when I rebooted my computer but it is still not quite finished. I think the problem stems from how hot it has been outside most of the week. Where I work has various levels of air conditioning from none to almost blowing, so I do get quite hot during the day. Being so hot, I get tired out by the time I get home, leaving me little energy to do anything but lay somewhere until my eyes close so I can do it again the next day. Though it is kind of interesting that it took me over a month to figure out why I have been so lazy lately.
Unfortunately, I am unlikely to get much else done this weekend. Not for lack of wanting, but I am getting some research in; I got a beta key for a game and it is only doing weekends at the moment. So Sunday night I should report what I have learned.
~gunnah
Unfortunately, I am unlikely to get much else done this weekend. Not for lack of wanting, but I am getting some research in; I got a beta key for a game and it is only doing weekends at the moment. So Sunday night I should report what I have learned.
~gunnah
15 July 2012
Unsure where the weekend went
I know I was going o work on my 3D well animation project, though I am not sure where the weekend went. I know I posted late on the last post, but that should have given me two decent days to work on this project. Somehow it seems like I just posted, I guess the weekend was just that cramped with things to do. Well, hopefully I can get back to where I was before my restart by the end of the week. Until then,
~gunnah
~gunnah
14 July 2012
Lost a bit of information
While I was going to share a few images that I had recently done, but before my reformat, I found that I am missing a bit of information. Most of the hard work is still there, which is nice, but a bit of the detailing and a little modeling was lost. Hopefully I will be back on track by the end of the weekend, though I am still trying to figure out what I am missing from what I used to have installed.
~gunnah
~gunnah
08 July 2012
A Little Set Back
So as it happens about twice a year I run into a computer virus. It hit Saturday morning about a half hour before I was going to post my updates for last week and has taken me most of the weekend to straighten out to a point close to where I was. I am hoping over the course of the week to get everything back to where it was and hopefully make a small it of progress. So next Friday I am going to post what I was going to last Friday and delay each additional post by one until I would have had a filler post.
Again, sorry for musing the last post,
~gunnah
Again, sorry for musing the last post,
~gunnah
01 July 2012
Work in Progress: Well Scene Animation (Part III)

~gunnah
30 June 2012
A little more learning
Over the week I had been playing around with the lantern, adding the holes to let light out, making a pattern over that to make it more interesting looking, adding a small candle and creating a flame. Of course I was not real pleased with the final result and was contemplating starting over since it was not close enough to the original image I had found. Unfortunately my computer made the decision, deciding to restart without any reason, losing all unsaved work in the process. So left with no other choice, I will probably spend the weekend redoing the lantern, though I am not sure how far back I want to go. The way the model is currently set up, I made need to start over nearly from scratch.
24 June 2012
Work in Progress: Well Scene Animation (Part II)


~gunnah
23 June 2012
Another Saturday Post
Not only am I late but have little to show. First off, why I am late. Fairly simple, fell asleep and did not wake up for quite some time. My job starts early and leaves me very tires, Friday night happened to be the first time I could just crash. As for lack of progress, in a phrase: Automatic Updates. I could swear I turned them off, but they still occur. Well, the one night I worked on the fountain animation scene, I was getting things done and then fell asleep. When my alarm went off in the morning, everything I had open was closed and all of my unsaved progress lost. While not difficult the little bushes in the front of the scene are time consuming since it involves setting each point for each vine. Hopefully I can have something cool done by the end of the weekend though,
~gunnah
~gunnah
18 June 2012
Work in Progress: Well Scene Animation (Part I)

As far as animation goes, I am looking to start everything off at rest. The wind will blow and move everything yo three-quarters maximum or so before dying down slightly to about half. Once at half it will pick back up again and go to maximum before completely dying. The trees should sway while the smaller plants in the foreground will only move when the wind reaches about two-third strength and then only will be a small deflection from rest. The lanterns should flicker and dim slightly when the wind is howling but return to rest once the wind stops. As the wind is dying I am hoping to illuminate the water in the well, slowly increasing intensity to maximum once the wind stops. The main effect once the wind stops is for smoke to billow out of the illuminated well out onto the foreground.
I know this has nothing to do with my game but I am hoping to learn some basics of animation and rigging which really have not been present so far in my work. While I do hope to continue on the Armored Tank Car texture, I have wanted to do something a little more high polygon for a while, another thing unavailable while making my game. So, until Friday
~gunnah
16 June 2012
Okay, not much done
.jpg)
~gunnah
11 June 2012
Work in Progress: Armored Train Car (Part II)

~gunnah
09 June 2012
I am calling it research
So this weekend is a beta event for a long awaited MMO. I doubt I will get much done otherwise, but I may run out of things to do, though very unlikely. I am hoping to finish the UV mapping for the armored tank car, only need to finish the turrets and that will be done. O yeah, and sorry this is late.
~gunnah
~gunnah
04 June 2012
Slow and Steady
Well, slow at least, not sure about how steady progress will be. I am hoping by the end of the week to have the UV-map for the armored tank car finished, though who knows how life will work out. I am down to my last handful of parts that need to be laid out, but these tend to be the more complicated pieces. Trying not to get too far ahead of myself going then I want to get this skin done and that skin and then this object and this level, once this part of the project is finished, I would like to get back to finishing up the road pieces. With the road pieces and car done, I will probably create a small set of tracks to put the car on, after all what good is a train without tracks?
Well, that seems like a reasonably sized post for the amount of work I can show. So post again at the end of the week, probably late one more time.
~gunnah
Well, that seems like a reasonably sized post for the amount of work I can show. So post again at the end of the week, probably late one more time.
~gunnah
02 June 2012
One Problem after Another
While I could start with what I did for the project, that would be near nothing and nothing demonstrable, so I am going to leave that there for the moment and go into why I missed last weeks two posts. The following is more of a rant and can safely be ignored from the prospective of the game, but it will be useful to me remembering why I missed a whole week.
Over the weekend when I made the last set of posts, I was starting to notice little red lines on my screen and did not know what it was. As the weekend grew into early that week, the amount of lines grew and horizontal green lines started forming before my screen just went black. So I had to order a new video card, killing whatever progress I was going to make that week, so I did not feel bad missing that Friday post. I spent much of that Friday night into Saturday morning putting the new card in the computer. Since I figured I had Sunday, I was not in a real hurry to get much done Saturday. Then Sunday came and I was needed to go plant shopping and till some of the gardens. So I had nothing done Sunday, hoping to do something for a surprise Monday night post. Well Monday did not progress as I hoped, leaving me little to post for the whole three-day weekend. I had a state exam in the middle of last week and since then I have been a little relaxed, enjoying not having anything looming over me for the time being. Thus I have little to show but a mile of excuses, but when does life really work out how one plans it?
Well, hopefully this weekend and next week will be better. O, and sorry for the late post,
~gunnah
21 May 2012
Work in Progress: Armored Train Car (Part I)

On another note, I have a dozen or so 3D tutorials that I am looking to do in varying degrees of completion - some are just modeling while others go all the way to texturing. Most are high-polygon count, which will be a nice change from what I have been doing. When I get around to these projects, I will be sure to post images. Also slightly unrelated, I am working on getting a Gallery section to show how far varying pieces of 3D art have come. While that is not a priority, I would like to get that working in the near future. Until next Friday, hopefully,
~gunnah
14 May 2012
A bit of decoration
Okay, I could have dove right back into the project trying to remember how I did everything and where I left off but I decided to do something different.I have begun work on a larger piece of decoration for the motor pool I hope to eventually fill, an armored train car. The car itself is historic, but I did not really choose it for any of its historical meaning and I will likely re-decal the car (probably making two skins, the historic and in-game, using the historic mostly to show off in a post), trying to make it my first big piece for this new map. Right now I only have the body blocked out, Mother's Day took more out of me than I thought it would, totaling only about 200 triangles (or 100 faces). As I add detail the number of faces will sky-rocket probably around 2000 to 2500 faces when all is said and done. This is not that bad as the car is about half the size of a small house, approximately 50 feet in length, though only 12 feet wide, which I was giving three to four thousand faces.
Do not really have much more to talk about and no pictures yet so I will end this post a little early. Hope everyone has a good week,
~gunnah
Do not really have much more to talk about and no pictures yet so I will end this post a little early. Hope everyone has a good week,
~gunnah
12 May 2012
And now back to our regularly scheduled program ...
Okay, not really, but life has simmered down quite a bit. Sorry about missing posting last week, but you would have gotten something along the lines of: nothing done, wait for life to cool down. Still nothing done, but I might get a few minutes to work on this project over the weekend. Again, there will be no real pictures for this section of work until I am pretty much done and can show them together. Hopefully I can finish the repeating set of roadways within a week or two and start the unique roadways b the end of the month.
30 April 2012
Coming in on the end of the semester
So there is only about two weeks remaining in the semester so I am busy with school work. I wish I could say I found a little time to work on this project, but it was just not in the cards. This week will probably be similar to last week if not more difficult so the next update on the game will probably be middle of next month, though I hope to be wrong.
~gunnah
~gunnah
23 April 2012
Small downtime
So I just realized where we were in the semester and how much I need to do. I really wish I had kept better track of where we were, but Life really has not liked me of late. I doubt I will get much of anything done in the next three weeks, as such I am switching to a Sunday night only schedule until the semester is over (after first full week in May). I am hoping I am wrong, but it seems that only happens when I think I am going to get something done. Have a good week and sorry about missing Friday's post,
~gunnah
~gunnah
16 April 2012
No pictures but progress
As I think I have already mentioned, I am making the walls in a single mesh despite being two or more objects. This is mostly to make my job simple when I go to tile them, I just need to match the.edges or the road to the wall and roof and the section is done. I think it may work if I had done the what I had initially planned, but this seems to be moving along so I am no messing with it. Unfortunately the lighting I have been using does not work well with this method of modeling. When I move it into an engine it will work fine, but inside the modeling program there is a problem. The automatic lighting make a spherical lit surface and this creates several very odd shadows where there should be none. Once in the engine a more appropriate lighting will be made so this problem will not be as bad, but it is a bit of a waste of time to do lighting for some so small.
Hopefully that was clear. Now what I did do, again no pictures because of lighting problem, is the wall and roof for the straight piece and the wall for the ninety degree turn. While that may not seen like a lot, that is both mesh and texture. That leaves five more tiling models and then I can move onto the custom pieces. With any luck I can continue making progress during the week.
~gunnah
14 April 2012
Changing shifts did not work as well as I hoped
So my dry run changing shifts worked rather poorly. I got very little done, mostly because I was tired the entire week and did not feel like doing much. On the up side, I am going back to my old shift next week, so I should start getting a few things done as I go along. Also, I am not sure if I wrote this or not, but I am making the walls as one model per road type. So instead of having two or three walls per road, there will only be one. This is mostly so the walls will snap to the grid in the same manner as the roadways. Hopefully I wioll have some of those to show off tomorrow.
~gunnah
~gunnah
09 April 2012
Another quick weekend
Okay, so I had a hard time getting things done with one of the days being a holiday. I am hoping that the next week will be favorable with the earlier shift I am going to be on, though no guarantees. In a perfect world, I would hope to have the walls finished by the end of the week. That may be hopeful thinking, but that is my goal. Until then,
~gunnah
~gunnah
07 April 2012
Small steps forward


So again, sorry for the late post, I hope this makes the direction I am moving in clear. A lot of modeling and texturing in the coming posts, though I am hoping they level pieces at least go together fast. The other pieces, the non-permanent tanks and missiles, will probably have more detail and take a bit longer to finish. My post tomorrow will probably be early since my shift at work changed for next week. Until then,
~gunnah
Subscribe to:
Comments (Atom)
