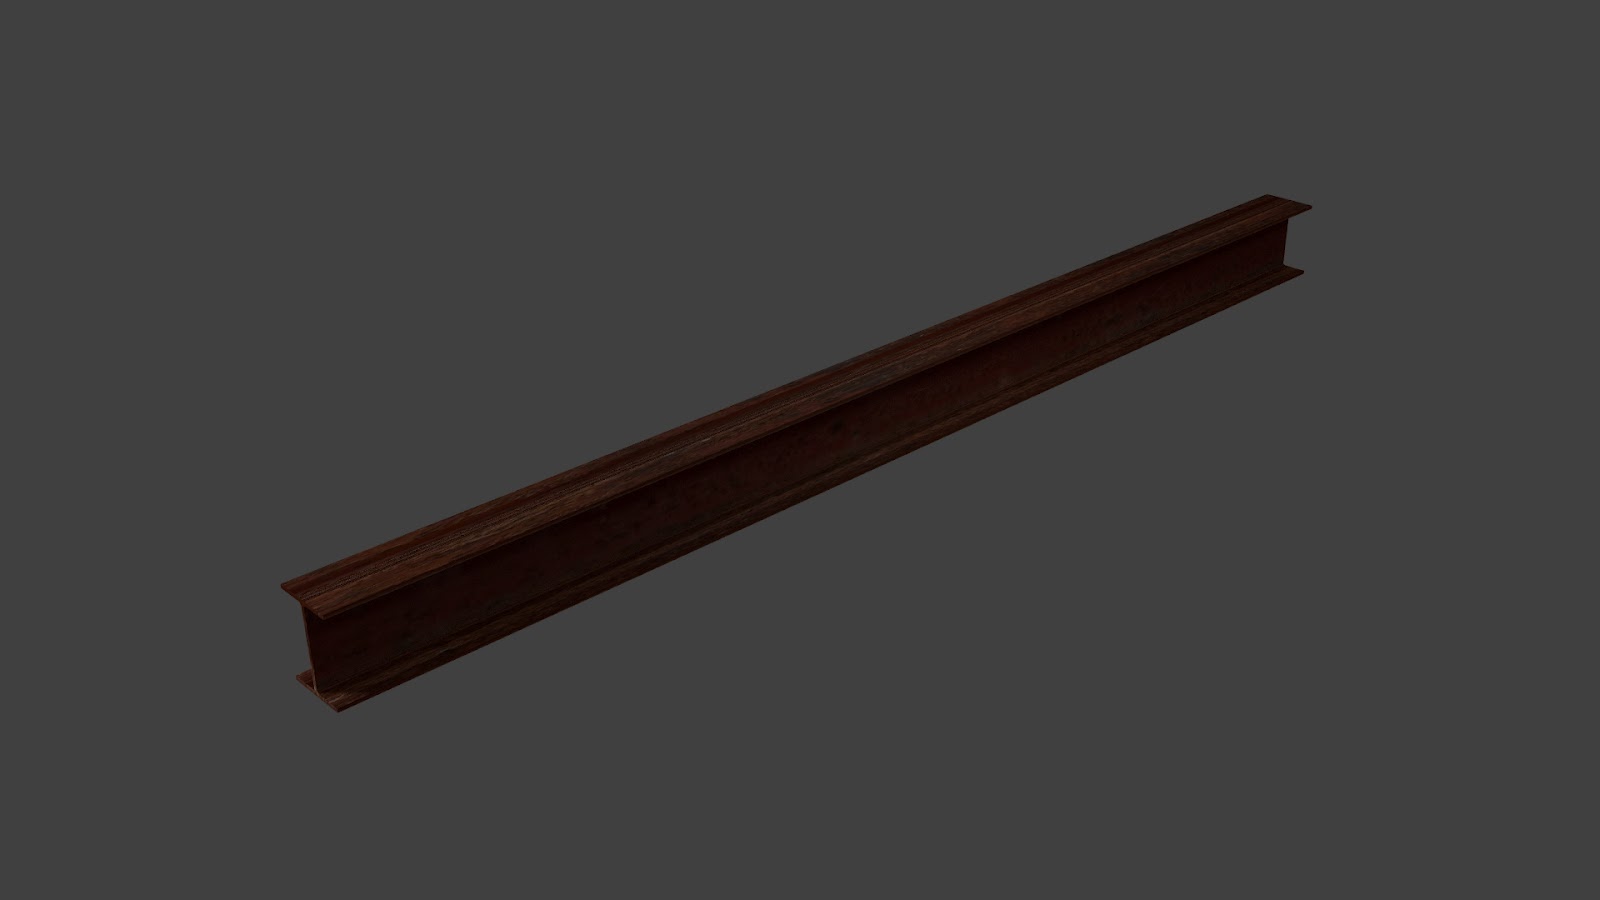
Now for me to pick apart the i-beam. The model itself I feel came out very nice and at 78 faces should not break anyone's computer. While I could construct an even lower polygon count i-beam - this one has some smoothing where the vertical piece meets each of the horizontal pieces - that is not a big worry at the moment, though might become one if my scenes get too detailed. What real bugs me is the texturing. Overall it is not awful, though would probably work nicer if the bump map was working as rust does not come off as flat as the model looks. But what is broken is the UV layout, which I realize means that even the nicest texture will not come out that great. For some reason the program insists on making each of the non-end-cap faces the same size on the UV map which causes the texture to stretch in tight spots, though it lays about how I want it to in the larger areas. Once I get the UV map to lay right, I can fit the texture again and see if that also needs work. Until next time,
~gunnah

No comments:
Post a Comment